Demo Day Done Right: Tearing Out the Old Without Trashing Your House (or Yourself)
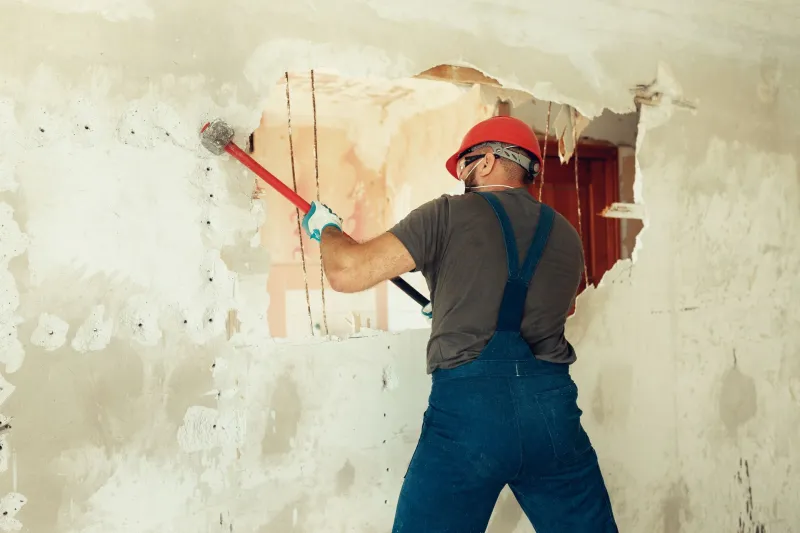
Photo: homeowner demolition sledgehammer drywall renovation safety glasses, via lirp.cdn-website.com
Every renovation video shows the same satisfying moment: a sledgehammer crashing through drywall, dust everywhere, music swelling. What the videos skip is everything that makes demo safe — the utility checks, the dust barriers, the dumpster logistics. Get those wrong, and your fun weekend turns into an ER visit or a five-figure repair bill.
Here's the unglamorous playbook for doing it right.
Before You Swing: The Non-Negotiable Checklist
1. Know what's in the wall. Before touching anything, locate plumbing, electrical, and HVAC runs. Turn off circuits and run a non-contact voltage tester along the wall. Look at where fixtures sit on the other side of the wall — a bathroom on the other side means supply and drain lines are hiding in there.
2. Kill the right utilities. Shut off water at the main if you're near any plumbing. Flip the relevant breaker off and verify it's dead — don't trust the panel labels, which are wrong in a remarkable number of American homes.
3. Rule out load-bearing walls. This is the big one. If a wall sits perpendicular to your floor joists, if there's a beam resting on it, or if it supports a floor above, it may be structural. When in doubt, spend $300–$600 on a structural engineer's opinion. That's cheap insurance compared to a sagging second floor.
4. Check for asbestos and lead. If your home was built before 1990, popcorn ceilings, old flooring adhesive, and insulation could contain asbestos. Pre-1978? Assume lead paint until tested. Test kits run $15–$30 at any hardware store, and professional testing runs a few hundred dollars. If either comes back positive, that material is a pro-only job — no exceptions.
Suit Up Like It Matters (Because It Does)
Demo injuries are almost always preventable with boring gear:
- N95 or P100 respirator — drywall dust and old insulation are genuinely bad for your lungs
- Safety glasses — non-negotiable, every single minute
- Work gloves and sturdy boots — nail punctures end demo days fast
- Hearing protection — sledgehammers and pry bars are loud in enclosed spaces
Also: know where your first aid kit is, and never demo alone in a house with no cell service. It sounds dramatic until it isn't.
Contain the Dust or Contain the Regret
Drywall dust gets everywhere — into HVAC systems, closed drawers, sealed boxes. Before you start:
- Tape plastic sheeting over doorways leading to the rest of the house
- Cover HVAC registers and returns in the work zone
- Run a box fan blowing out a window to create negative pressure
- Remove or shrink-wrap anything you care about
A $30 roll of plastic and painter's tape saves hours of cleaning and protects your furnace filter from a season of fine dust.
The Demo Itself: Slow Is Smooth
Start with the easy stuff: pull trim, doors, and cabinets with a pry bar before any hammering. Then remove drywall in manageable sections — score it with a utility knife, break it with a hammer, and pull it off by hand. This gives you visibility into the cavity before you're blindly prying at framing.
Watch for surprises as you go: wires that don't match your circuit map, pipes that shouldn't be there, or black mastic that looks suspicious. Seeing something odd is your cue to pause, not push through.
Plan the Mess Before It Exists
A full bathroom demo generates a ton of debris — more than most first-timers expect. Your options:
- Dumpster rental: $300–$500 for a week, best for big jobs
- Bagster-style bags: around $30 plus pickup fees, good for mid-size projects
- Truck runs to the transfer station: cheapest, but check your county's rules on construction debris
Do not count on your weekly trash pickup to absorb a gutted bathroom. Some municipalities will fine you for it.
When to Stop and Call a Pro
Stop work immediately and bring in help if you find:
- Cloth-wrapped wiring, aluminum wiring, or junction boxes buried in walls
- Suspected asbestos or lead paint
- Plumbing that's actively connected and you can't trace it
- A wall that turns out to be structural
- Mold larger than a small patch — disturbing it spreads spores
None of these mean the project is dead. They just mean the next step belongs to someone licensed.
Demo is honestly the easiest part of renovating — no precision, no finishing skill required. But easy isn't the same as careless. Do the boring prep, protect your lungs, and the sledgehammer part is as fun as it looks.